Download of the AimBetter Agent
To update the AimBetter Agent, download the “Aimbetter_Agent.zip” file to the Agent Server: https://update.aimbetter.com/Aimbetter_Agent.zip
Run the file, and that’s it!
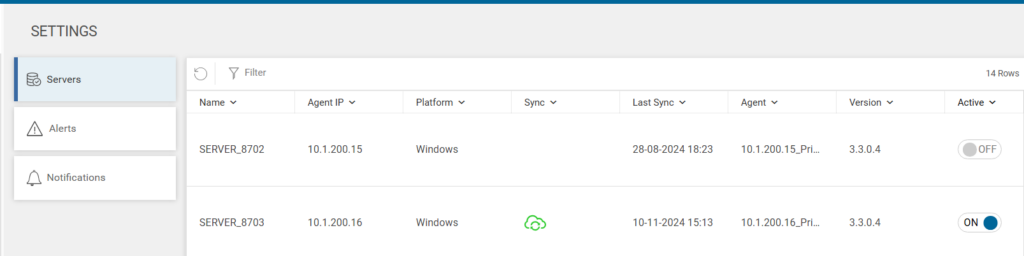
Notice: You can check the Agent Server IP in the Server Settings.
All the previous configurations will remain, and all lights should be green.
If you want to configure additional servers to monitor, follow the steps in the Installation Guide.
If there is some problem with the update, check the Update Troubleshooting below.
Update Troubleshooting
1- There is a red light in the AimBetter Configuration window
If the AimBetter Configuration window shows a red light, check its meaning on the Troubleshooting Installation Issues page.
2- The update is taking too long – more than 1 minute
The update of the AimBetter Agent shouldn’t take more than 1 minute. If it’s taking longer, we recommend manually stopping the AimBetter Agent.
This problem occurs because the AimBetter Agent service must be stopped during the update/deletion process, and when the user running this service has restricted permissions, the program can’t do it by itself.
3- The update program can’t be executed
In rare cases where the AimBetter_Agent.exe can’t be executed in the Agent server’:
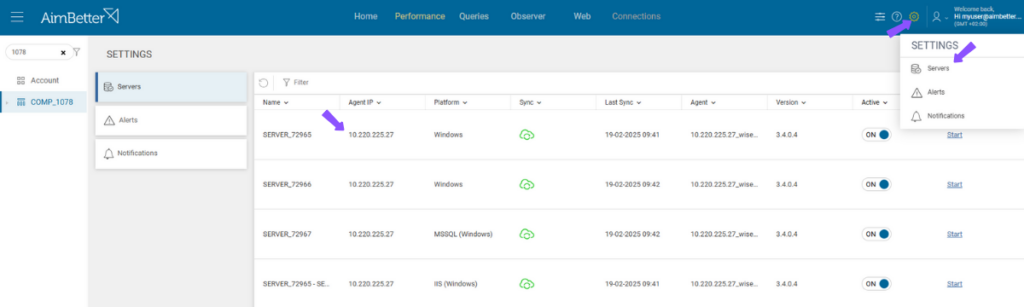
1. Login to the Agent server. To find out which one is the Agent server, go to Settings -> Servers and look up the Agent IP column. If there is more than one Agent Server, proceed with the following instructions for each Agent Server.
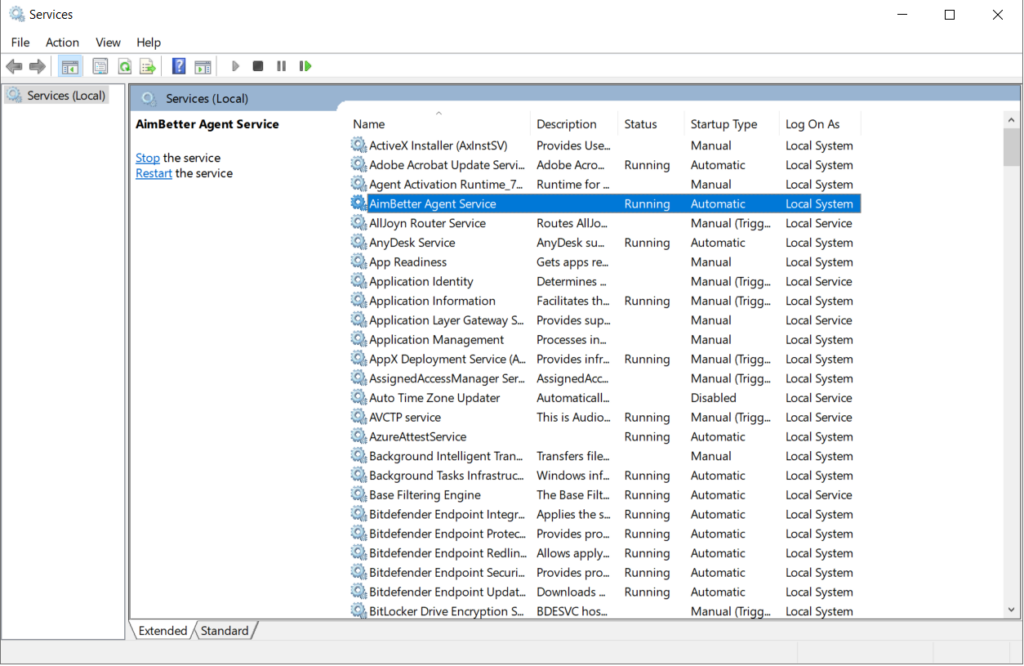
2. Stop AimBetter Agent service from Services.
3. Look for the following path:
C:\Program Files (x86)\AimBetter\Monitor\Agent\data4. Copy the agent.bs file to an external path (for example, to the Desktop).
5. Uninstall the AimBetter Agent Configuration program.
6. Download and run the latest AimBetter_Agent.exe file and proceed with the installation until the “Activate your account” step. Close the program.
7. You can do the previous step on another station and copy the full content of the created AimBetter Folder C:\Program Files (x86) to the Agent server.
Warning: The following step should be done only after AimBetter’s team confirms that the new version is compatible with the former version.
8. Paste the agent.bs file copied (step 4) to the following path: C:\Program Files (x86)\AimBetter\Monitor\Agent\data
9. Start AimBetter Agent Service.
10. Once you are done, check that the servers are monitored in the AimBetter console https://app.aimbetter.com
4- There is an update error: ‘Error 1402. Could not open key: UNKNOWN…’
If, during an update of the AimBetter Agent, the following Error is received,
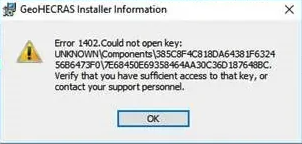
The “Error 1402. Could not open key: UNKNOWN” typically occurs during the installation or update of an application when the installer cannot access a specific registry key. This can happen due to insufficient permissions, corruption in the registry, or software conflicts with overzealous security software blocking access to certain registry keys. Leftover entries from an earlier installation may also interfere with the update.
Steps to resolve a specific registry key issue:
- Identify the Problematic Key – The error message will often specify the registry key causing the issue. Look for it in the details of the error log or message.
- Modify Registry Permissions
⚠️ Caution: Modifying the registry can be risky. Backup the registry before proceeding:
- Open the Registry Editor:
- Press
Win + R, typeregedit, and press Enter.
- Press
- Navigate to the problematic key (or its parent key if “UNKNOWN” is listed).
- Right-click on the key and choose Permissions.
- Add or ensure the current user or
SYSTEMaccount has Full Control permissions. - If permissions cannot be changed directly, take ownership:
- In the Permissions window, click Advanced.
- Set the owner to the current user or the Administrators group.
Use Microsoft’s Troubleshooting Tools
- Run the Program Install and Uninstall Troubleshooter from Microsoft. This tool fixes registry issues and cleans up remnants of previous installations.
Clear Leftover Registry Entries
- Use a tool like CCleaner to scan and remove orphaned or corrupt registry keys (optional but can be helpful).
Re-register Windows Installer
- Sometimes, the Windows Installer service might be the root cause.
- Re-register it: Open a Command Prompt as Administrator and run the following commands:
msiexec /unregister msiexec /register
Restart the Computer in Safe Mode
- Boot into Safe Mode and retry the installation. Safe Mode often bypasses interference from third-party software.
Check for System Integrity Issues
- Run the System File Checker to repair corrupt system files:
- Open Command Prompt as Administrator and execute:
sfc /scannow
.
5- AimBetter Folder Logs
If further assistance is needed, please send the AimBetter folder logs and a description of the problem to [email protected].

 +1 (650) 449-8622